Tofu Lettuce Wraps

Happy Saint Patrick’s Day!  The luck of the Irish is not with me today, in spite of the fact that my heritage is Irish and Welsh.  Nope, just wrote almost this entire post and then accidentally erased it (darn you insert photo for being near the new post button).  I realize this could be corrected by doing this in a word format, and then possibly copying/pasting, but I’m not sure how the format will work from one source to the other.

I’ve been meaning to post this for a while now, and had hoped to get another recipe or two up, but based on the fact that I just had an hour of work erased, I’ll be lucky to get this one up.  With the help of some sangria, I’ll be lucky if this isn’t riddled with typos, but at least those will be fun to make!

One of my favorite things about these lettuce wraps is the filling usually lasts for 2 days.  On the second day I like to add broccoli and some crushed peanuts and serve over rice.  It makes it seem like you’re eating a whole new dish instead of leftovers.

For some of the ingredients used you will have to visit the “Ethnic” aisle of the grocery store.  We use the Hokan brand for the Five Spice powder, water chestnuts, and Hoisin sauce and we use the San-J brand of soy sauce.

Tofu Lettuce Wraps

Prep/cook time:  Combined total of about 40 minutes

Image

Ingredients

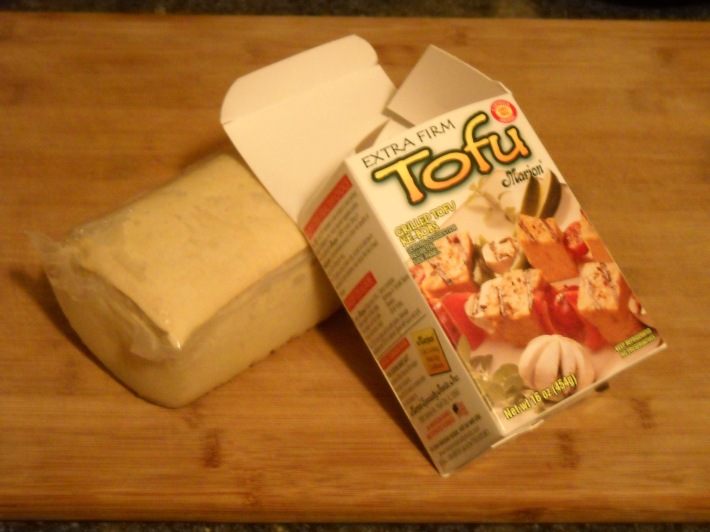
  • 1 block extra firm Tofu (we like the Marjon brand)
  • 3 cloves garlic
  • 3 1/2 tsp Five Spice Powder, separated into 1 1/2 tsp and 2 tsp.
  • 1 bunch scallions (also known as green onions)
  • 1 red bell pepper
  • 1 can water chestnuts
  • 1/2 cup matchstick carrots
  • 1 1/2 Tbsp vegetable or peanut oil
  • 1/2 tsp crushed red pepper
  • 2 tsp ground ginger
  • 2 1/2 Tbsp Soy Sauce
  • 2 1/2 Tbsp Hoisin Sauce
  • 1 head Iceberg lettuce

Optional Ingredients for Topping

  • Peanut Sauce
  • Asian Hot Sauce (Thai Kitchen or Sriracha)
  • Cilantro
  • Fresh Lime Juice

Tools

  • Cutting Board
  • Knife
  • Glass casserole dish
  • Skillet
  • Cooking Spatula

What To Do

  1. Preheat oven to 275.
  2. Drain tofu.  Tofu is usually packed in some water.  For this dish, you do not need to remove all of the water.  Just drain the water from the package, and lightly squeeze the tofu to drain additional water.  You can do this by pressing the tofu between your palms and alternating sides along the cube.Image
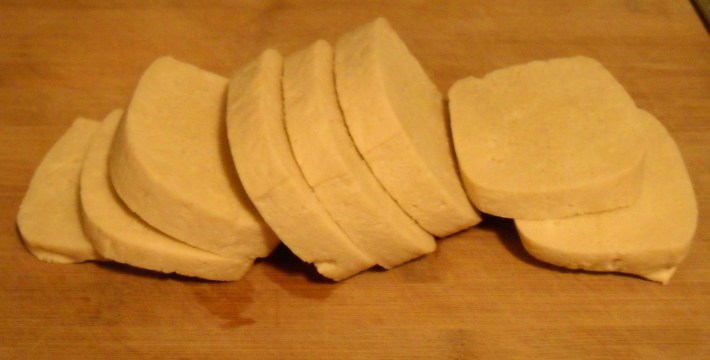
  3. Cut the tofu cube in thin slices along the width, like so:Image
  4. Take half of the “loaf” and cut in thin strips.Image
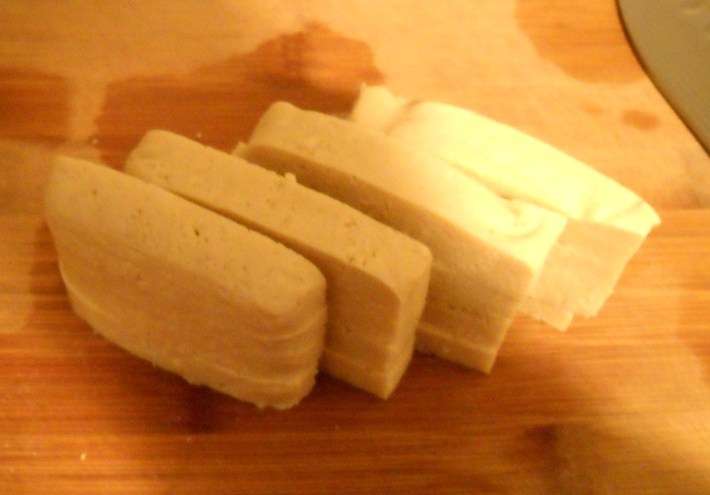
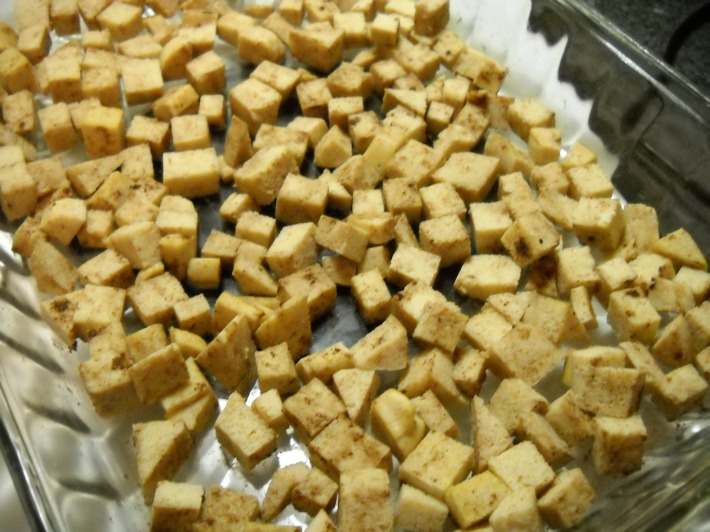
  5. Cut into small squares and place in the glass casserole dish.
  6. Repeat step 4 and 5 with the other half of the tofu, and put the casserole dish in the oven for about 20 minutes.
  7. While the tofu is cooking…
  8. Clean and dry vegetables.
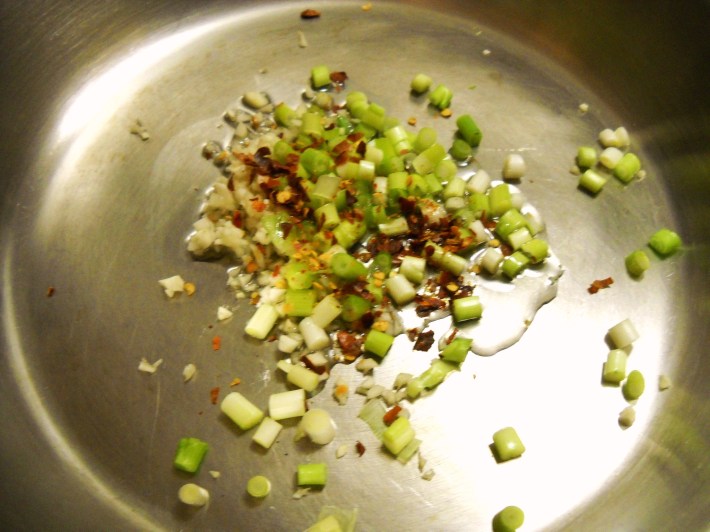
  9. Remove paper from garlic and mince finely.  Place in skillet.
  10. Prep scallions by cutting off the stems and the top 1/4 inch of the greens.Image
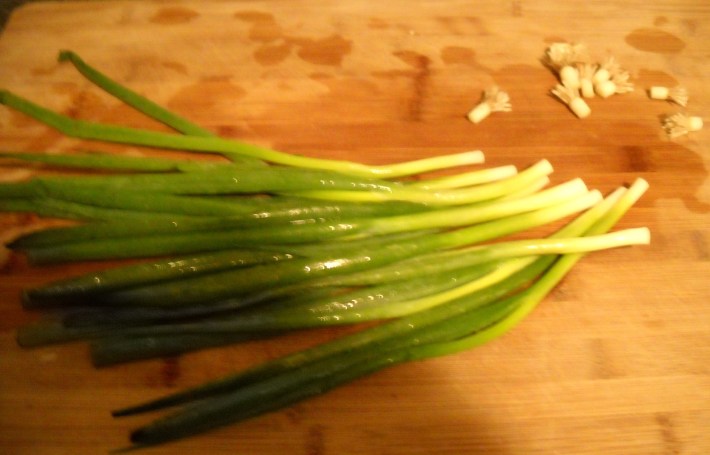
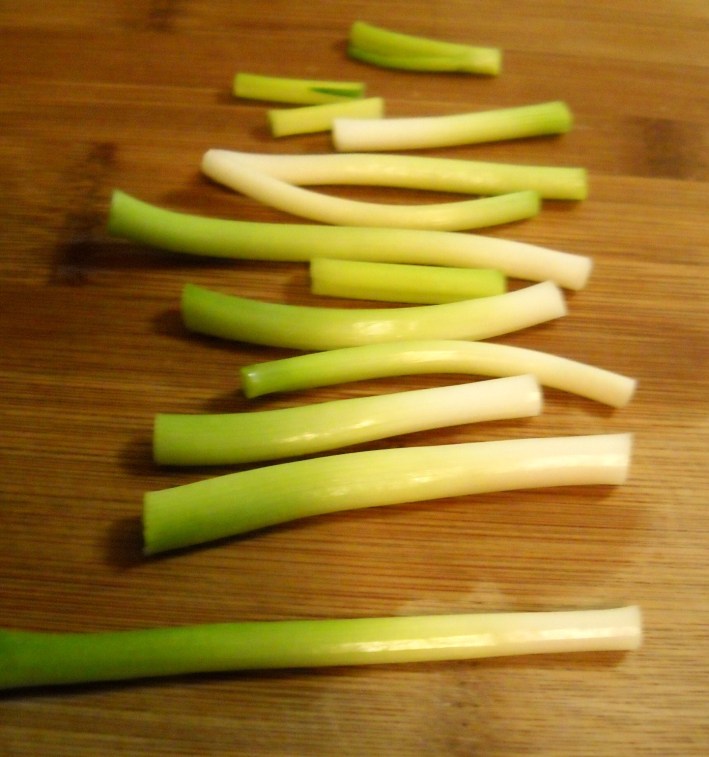
  11. Remove the whites from the greens.  Image
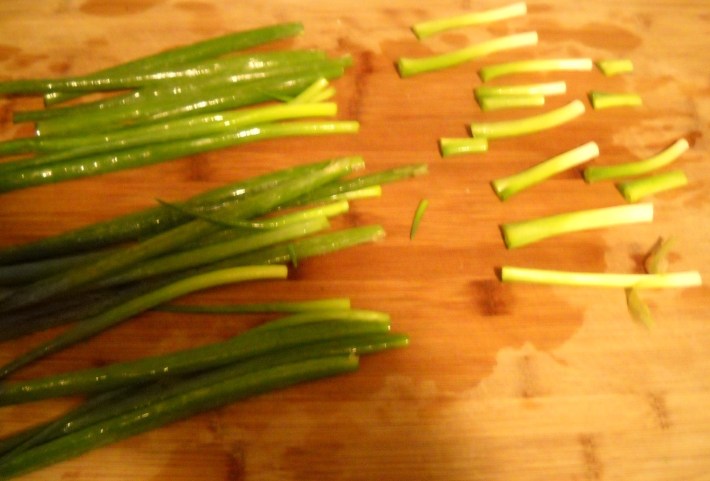
  12. Discard any part of the greens that are limp, and remove any outside layer of the whites that is fibrous or looks dirty.Image
  13. Dice the whites into small rings and add to the skillet with the garlic.Image
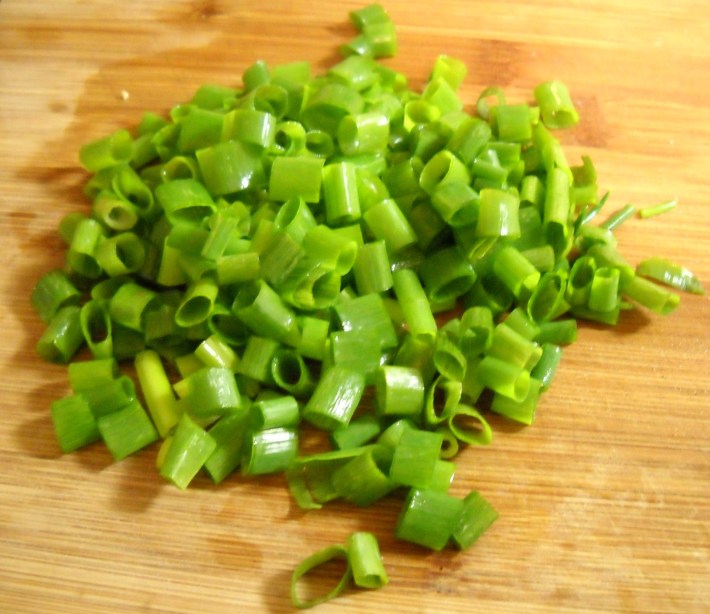
  14. Slice the remaining greens into thin rings and set aside.Image
  15. By this time, it’s probably been 20 minutes since you put the tofu in the oven.  Remove the tofu (keep the oven on) and sprinkle 1 1/2 tsp Five Spice Powder over the tofu.Image
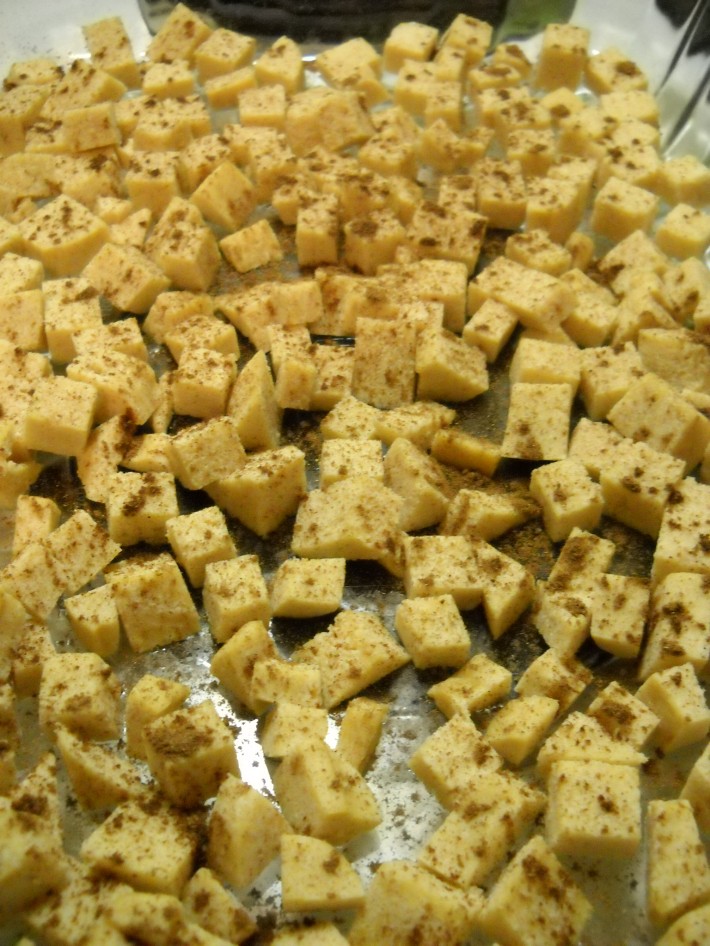
  16. Use the spatula to stir the tofu to make sure it gets well coated with the Five Spice Powder.  You may need to scrape the pan to help stir all of the tofu. Once the tofu is stirred, and coated with Five Spice Powder, return it to the oven.Image
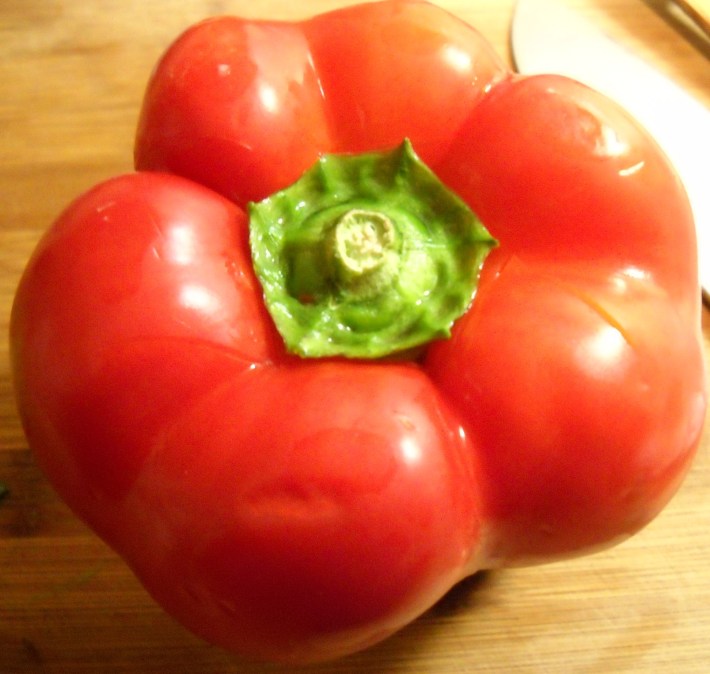
  17. Now, take the red bell pepper, and cut along the outside of the green stem (you’re cutting into the red pepper).Image
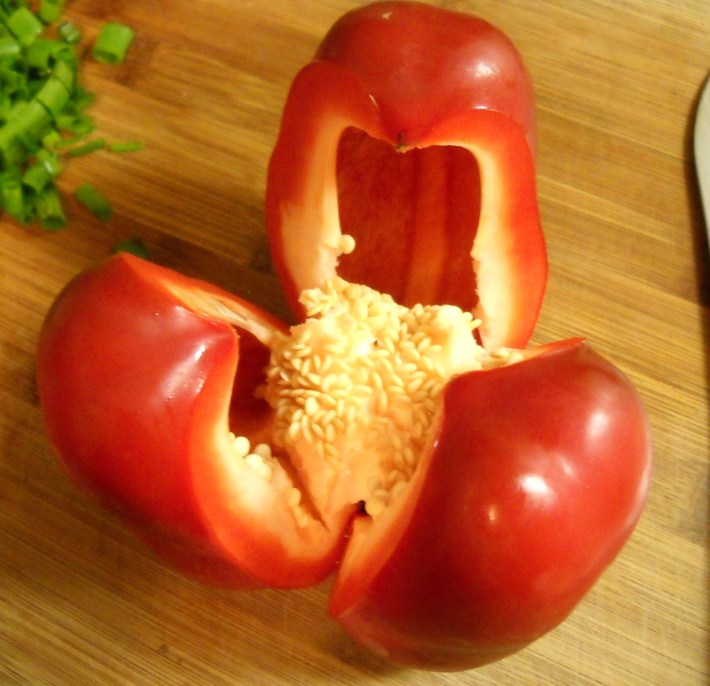
  18. Then, flip the pepper over, and cut straight lines, separating the pepper into the different segments (most will have 3-4 segments).  The pepper I used has 3 segments.Image
  19. Pull the segments apart to expose the seeds.Image
  20. Remove the seeds and any of the whiter skin on the interior.Image
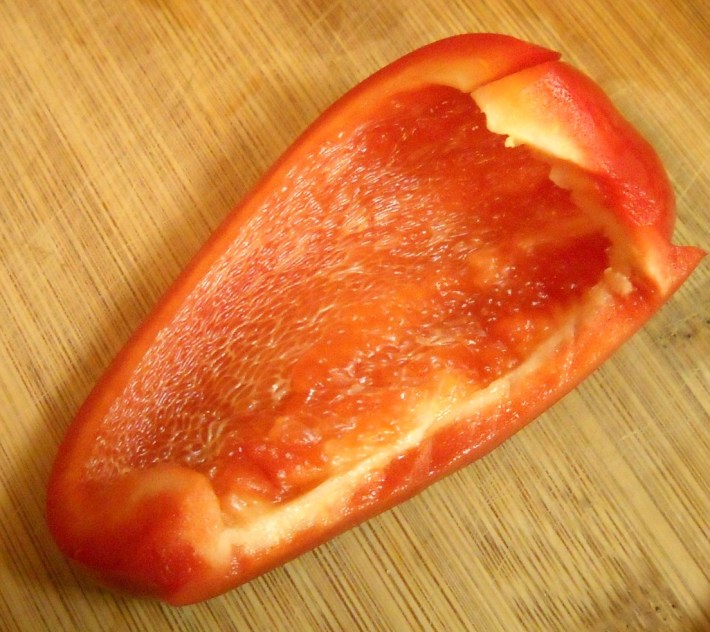
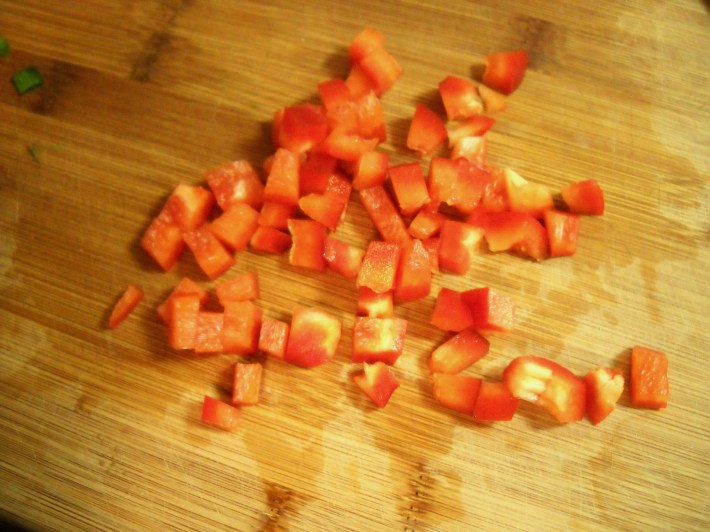
  21. Cut the bell pepper by removing the curved top and bottom.  Cut the majority of the pepper in strips.Image
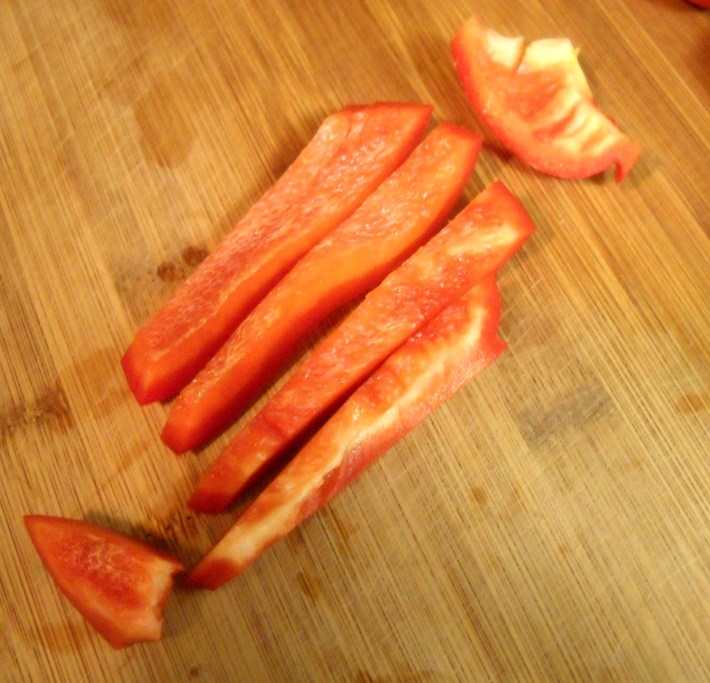
  22. Dice the smaller pieces of red pepper and set aside.Image
  23. Open the can of water chestnuts and drain the water.  Dice the water chestnuts into small pieces.  Set aside.
  24. Take the matchstick carrots and cut smaller.  I recommend doing this by placing the carrots in a small pile on your cutting board.  Cut in 2 sections one way, and then do a crosscut with 2 sections as well.  Set aside.Image
  25. Prep your lettuce by washing and draining.  You can either cut the stem out of the lettuce, peel the leaves off, or use my preferred method of hitting the lettuce just next to the stem on the counter edge, and pull the stem out.  I recommend placing the prepped leaves in a bowl and sticking in the fridge until the dish is ready to serve.
  26. Add oil and crushed red pepper to the skillet (with the garlic and scallions) and heat on medium heat.Image
  27. Let this saute for about 2 minutes, stirring / tossing consistently.
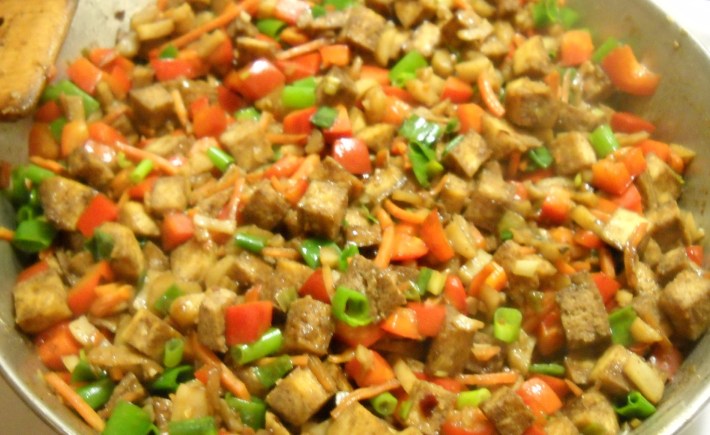
  28. Add red bell pepper, carrots, water chestnuts, remaining Five Spice Powder and ginger, and stir.
  29. Remove tofu from the oven (turn the oven off, now), and put in the skillet.
  30. Add soy sauce and hoisin and mix thoroughly.
  31. Remove from heat, and stir in scallions.Image
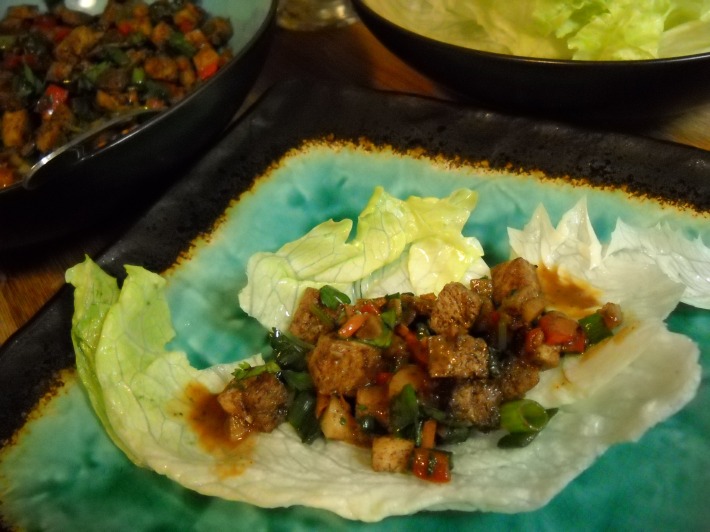
  32. We like to serve this dish by putting all the ingredients on the table and building them as we go.  If you’ve never built a lettuce wrap before, you take a small amount of filling and put in the “cup” part of the leaf.  Top with your preferred sauce, and fold the sides in like a burrito.  Keep lots of napkins nearby for this one!Image

And enjoy!

Basic Marinara

I feel like I owe a recipe, because it’s been a while since the last time I was able to get on here.  I really want to go to bed (it’s been a long day), but I promised some friends I’d get a basic marinara up soon, so here it is.  I made a dish with this tonight, but I don’t have enough time for that one.  Hopefully soon I’ll post what I’ve been up to the last few days.

This sauce is great to make in bulk and to freeze in separate containers for later use.  It’s tasty on spaghetti noodles with a little parmesan cheese, or use it as a dipping sauce.  Use meat if you like, or throw in bell peppers, more onion, carrots and zucchini (and mushrooms if you like them – I’m not a fan of them myself) for a chunky primavera.  Let it simmer on the stove all day to reduce some of the water content and make your house smell good.  It’s quite versatile.

The measurements for this are perfect for one dish.  Double, triple or quadruple to keep it on hand (frozen) for use later on.  Sorry there are no pictures on this one, but I needed to whip it up for the other dish (stuffed zucchini – I promise I’ll get that up soon!), and I’ve only got the pictures of that.  This is pretty simple though, and it uses basic measurements, and techniques we’ve already covered in other recipes.

Ingredients

  • 28 oz can tomatoes (we like the Hunt’s Garlic, Basil and Oregano).  You can also use the smaller cans for other flavors depending on what you are making, but this is perfect for a basic marinara.
  • 4 cloves of garlic
  • 1/4 small red onion
  • 1/2 tsp Crushed Red Pepper (optional)
  • 1 1/2 Tbsp Extra Virgin Olive Oil
  • 1 Bay leaf
  • 1 tsp (dried) Oregano
  • 1/2 Tbsp Balsamic Vinegar
  • 1/2 Tbsp white sugar
  • 3/4 tsp Salt
  • 1 tsp (dried) Sweet Basil

Tools

  • Stick blender
  • Cutting board
  • Knife
  • Saucepan
  • Cooking Spoon
  • Measuring spoons

What To Do

  1. Blend tomatoes in can until they are at your desired consistency.  (Refer to step 2 in the Farfalle with Arrabbiata recipe), and set aside.
  2. Peel paper from garlic cloves and mince (refer to step 3-4 in the Capellini Pomodoro recipe) and put in saucepan.
  3. Dice onion (just like steps 6 and 7 for the Arrabbiata) and put in saucepan.
  4. Add crushed red pepper (optional).
  5. Pour on olive oil, and apply medium heat.
  6. Score Bay leaf by pressing your thumb nail lightly into it and creating small cracks.  Add to saute mix.
  7. Oil should be sizzling by now – stir the ingredients and add the oregano.
  8. When onions start to get clear, pour in  tomato puree.
  9. Simmer and add balsamic vinegar, sugar, and salt (more or less to taste).  Cook for about 10 minutes to heat thoroughly (you can simmer longer if you like, but make sure you reduce the heat to low and check the liquid every 20 minutes or so as to not cause burning), stirring regularly.
  10. Add the basil about 5 minutes before you remove from the heat to serve.
  11. Remove bay leaf before serving.

All done!  Enjoy!

Eminoodle’s Pasta Salad

I normally won’t write about my coworkers here (unless I happen to mention one of my best friends who works with me AND lives next door, but she’s a special circumstance), but I want to give a little background on this pasta dish.  One of my coworkers is thinking of changing some lifestyle habits, and I had the pleasure of having lunch with her yesterday and talking about it.  Today we had a surprise pot luck at work for her, because she is going away for a little while.  I’m fairly new to the team where we work together, but I love this lady.  She is so sweet, and accepting, and she’s smart and funny and just a great person.  She’s a little younger than my mom would have been (my mom passed away 8 1/2 years ago), but I think they would have been great friends if they had met.  i don’t know if you’ve ever met someone who you just know adds something to your life, but this coworker of mine does this for me.  She is a very special lady.

So, she is new to eating more vegetables, and I wanted to show her how good they can be if done right.  I had another coworker (who ate with us) ask for the recipe, and being as this has been becoming one of my signature dishes at work, I’d like to share it (next time I’ll make something else for the pot luck!).  She also gave me this nickname, and since I’m struggling to come up with a name for this dish, I thought this was fitting.

My apologies for lack of pictures on this one.  However, a lot of the steps that we’ll go through we did on previous recipes, so I’ll link back to those for visual aids.

Eminoodle’s Pasta Salad

Prep time: 30 minutes

Ingredients

  • 1 box rotini.  Barilla makes this excellent line of pastas now that have veggies in the mix.  For this one I really like the green rotini.  It’s made from spinach and zucchini puree, so it adds even more veggie goodness.
  • 1/2 small red onion (1/4 if a large onion)
  • 3 roma tomatoes (2 if you use on-the-vine)
  • 1 can quartered artichoke hearts
  • 1 cup green salad olives
  • 1 package sweet basil
  • 1 block of mozzarella
  • 1 Tbsp balsamic vinegar
  • 2 Tbsp red wine vinegar
  • 4 Tbsp extra virgin olive oil
  • 1/2 Tbsp salt
  • 1 tsp garlic powder

Tools

  • Cutting board
  • Knife
  • Stock pot
  • Colander
  • Large bowl for serving
  • Cooking spoon

What To Do

  1. Fill stock pot with water and heat at medium high to boil.
  2. Clean tomatoes and basil.  You can use the 3 parts water, 1 part vinegar mix to clean the tomatoes and basil.  Rinse well and dry the tomatoes and blot the basil to dry.  Set aside.
  3. Your water is probably boiling by now, if so, add your pasta.  If not, revisit this step when the water is boiling.
  4. Dice onion, but cutting into small slices and then doing a radial cut (like we did in this recipe.)  Place in large bowl.
  5. Don’t forget to stir the pasta.
  6. Cut tomatoes in half, remove vine belly button, and remove the seeds from the tomatoes (like we did in steps 6 and 7 of this recipe.)
  7. Dice the tomatoes and place in the large bowl.
  8. Stir the pasta.
  9. Open the can of artichoke hearts, and drain the water.  Cut into thirds (leaves, and then half the base).  Discard any leaves that seem too tough.  Put cut up artichoke hearts in the bowl.
  10. Stir the pasta.
  11. Add olives to the mix in the large bowl.
  12. Also referring to the capellini pomodoro recipe, remove the basil from the stems, and do that fancy chiffonade cut (steps 9 and 10).  Add to the bowl.
  13. The pasta is most likely done now.  Test to make sure it’s cooked thoroughly, and drain in colander.
  14. Cut mozzarella chunk into 1/4″ cubes.  I recommend cutting into approximately 1/4″ slices, then cutting the slices in stacks of 3 – cut in half lengthwise, and then in quarters.  Add to bowl.
  15. Test the pasta to see if it has cooled down.  If not, you can rinse it with cold water until it is cool.  Once the pasta is cooled, place in the bowl.
  16. Drizzle on olive oil, balsamic vinegar and red wine vinegars.
  17. Sprinkle on salt, and garlic power.
  18. Mix thoroughly until oil/vinegars are spread throughout the dish and everything is coated.

Serve immediately or refrigerate overnight and serve the next day.  This is a versatile dish that can be used as a main course (Carl and I will eat this sometimes for a meal), or share as a side dish.

Sadly I have no pictures of this one, but I’ve made other varieties, using cherry tomatoes instead of diced tomatoes (I prefer the diced/deseeded tomatoes, because I will eat those – I don’t eat cherry tomatoes because of the goopy inside, as you know if you read the full entry for cappelini pomodoro), kalamata olives (with no pits) in place of artichoke hearts, and tri-color rotini.  Here’s a picture of that one.

Image

The recipe in this blog entry is my preferred way to make this dish, but pasta salad is great because you can add whatever veggies you want for different flavor combinations.

Hearty Potato Tofu Bake

We’re having a bit of a cold front here in Florida (which I realize is downright balmy in other states – I moved here 5 1/2 years ago from Minnesota), so here’s a good one to make for the colder days.  We’ll make this hearty dish one day and reheat the leftovers for a day or two.

Prep Time: about 30 minutes

Cook Time: 45 minutes

Ingredients

  • 5 red potatoes
  • 1/2 red onion
  • 4-6 (about 2/3 oz.) garlic cloves
  • 1 package of Marjon Grilled Tofu (or another brand or protein)
  • 1/4 teaspoon (tsp) dried Sage
  • 3/4 tsp dried Thyme
  • 1 tsp dried Rosemary
  • 1 1/2 Tablespoons (Tbsp) Extra Virgin Olive Oil
  • 2 tsp Salt (hold 1/2 tsp aside for a later step)
  • 3 Cups (approximately 5 oz.) broccoli florets
  • 1 Cup (approximately 2 1/2 oz.) matchstick carrots
  • Optional Suggestions for Toppings:  Shredded Cheddar Cheese and Sour Cream

Tools

  • glass casserole dish
  • cutting board
  • knife
  • mortar and pestle
  • strip of foil (to cover casserole dish)

What To Do

1. Clean potatoes.  You can use a scouring pad to help with scrubbing.  I’m a little OCD so I also will use a knife to cut out some of the deeper eyes.  Carl assures me these are fine to cook, but hi!  OCD!  If I even suspect that there’s dirt stuck in those parts I’ll cut that out.    I also cut off any bruises.

2. Preheat the oven to 375 degrees.

3. Dice potatoes into bite sized cubes.  The best way I’ve found to do this is to cut the potato in thick discs, then take half of those (putting the largest disk and stacked up to end of potato) on the cutting board and cut one direction, and then do a perpendicular cross cut, like this:

ImageImageImageImage

4. Put the diced potato chunks in the casserole dish as you cut them to keep space on the cutting board.

Image

5. Now it’s time to cut up the onion.  We had half an onion in the fridge from a previous dish.  We go through onions on a regular basis, so we often have some left over from a meal we’ve made earlier in the week.  If you’ve never cut up an onion before here are some tips:

  • Have a candle burning nearby to help avoid uncontrollable bawling.  Unless you like being a drama queen, then apply lots of mascara first.
  • Cut the bottom of the onion off (the roots), and cut the top of the onion off.  Remove the first few outer layers of skin.  You want to pull off any skin that is dry and papery or not uniform in color.  When you get to the layer of skin that is uniform in color and a nice shiny/firm skin, you’re at the sweet spot.  I usually run this under water at this point to help reduce the fumes/tears.
  • Setting the onion on one of the flat sides (from where you cut off the roots or top), cut the onion in half from top to bottom roots).  You can wrap up the half you aren’t using, and it will stay good in your produce drawer until you get back to it later in the week or two weeks.  Don’t believe that nonsense story on Facebook about how onions cause food poisoning or how onions absorb viruses from the air.  They’re both lies.

http://www.snopes.com/food/tainted/cutonions.asp http://www.snopes.com/medical/swineflu/onion.asp

You should be left with something like this:

Image

6.  Cut the remaining half of the onion using thick slices.

Image

7. Then (just like the potatoes) take half of the stack placing the halfway point (thickest slice) on the cutting board.  Now you’re going to make a radial cut (like you would slice a pie).

Image

8. Layer the onion (separate any chunks sticking together) on top of the potatoes in the dish.

9. Next, dice your garlic.  We’ll do this the same way we did it for the Cappelini Pomodoro.  Prep your garlic cloves by cutting off the tips and removing the paper, then cut in thin slices and with a crosscut.  After that cut the pile repeatedly until you have minced garlic.

ImageImageImage

10. Spread the garlic over the potatoes and onion in the dish.

11.  Now is time to cut up the tofu.  For this dish we recommend the Marjon Grilled Tofu, but I don’t know if this is something you can find outside of Florida.  If you already eat tofu, make your own changes on this recipe by adding your favorite.  We prefer extra firm varieties, and if you can find the Marjon brand it is fantastic.  Their website in case you want to check them out or learn more about them is here (http://www.marjonspecialtyfoods.com/index.php).  It is not recommended to use silken tofu for this dish.

Image

Remove the tofu from the packaging, and cut by stacking the two pieces together, cutting across the length and followed by a cross cut.  Your diced tofu should be about the same size as the potatoes.

ImageImage

12. Layer the tofu on top of the potatoes, onion and garlic in the casserole dish.

13.  Now it’s time for the herbs!  Put your measured herbs into the mortar (the base part) to grind with the pestle (crusher – or magic wand!).  Your herbs when you first put them in:

Image

Then you’ll use the pestle to grind them.  Why?

  • Because grinding the herbs down releases more of the oils in the herbs and makes them more fragrant and delicious.
  • Because breaking down the herbs creates a bigger surface area – the smaller the pieces of something, the more flavor they will imbue into the dish.  This also makes it easier to get the full flavor from the herb combination into each bite.  If you don’t do this, you might notice the flavors vary from strongly of rosemary on one bite to very sage-y on another bite.
  • Because smaller pieces are easier to chew and break down when you’re eating.

Using your pestle, apply pressure and rotate around the mortar on the herbs.  It helps to do this in the middle and on the edges.  When you’re done, the herb mixture should look like this:

Image

14. Sprinkle 1 1/2 tsp onto the mix in the casserole dish.  Hold the remaining 1/2 tsp to the side (you can keep it in the mortar).

15. Drizzle olive oil over the mix.

16. Sprinkle 1 1/2 tsp of salt over this:

Image17. Mix this combination and cover with foil.  Place in oven to cook for 15 minutes.

18. After 15 minutes, take the dish out, stir the ingredients again.  Your potatoes might stick a little, just scrape this up with your spoon.  This will give delicious crunchy parts when you’re eating it.  Recover the dish, and put back in the oven for another 15 minutes.

19. Prep your broccoli.  For this dish we use pre-cut broccoli, since this dish does not use the stalk from the broccoli.  We usually grab the Eat Smart! pre-cut and packaged broccoli in our produce section at the store.  The first step to prepping your broccoli, is cutting off the majority of the stalk so you’re just left with mostly florets:

Image

20. Next, cut the florets down until they are about half the size of the potato chunks.  You can cut along the stalk by putting the floret down on its top on the cutting board, and cut the stalk in quarters from the stalk up through the floret.  You should have something like this when you’re done:

Image

21. After the dish has cooked for the second 15 minute interval, remove from the oven.  Stir the mix that has been cooking (again with those crunchy bits), add the broccoli and carrots (carrots require no prep since they are matchstick), sprinkle on the remaining salt (1/2 tsp) and remaining herb mixture (1/2 tsp).  Do not stir the combination. Re-cover the dish with foil, and cook for the final 15 minute stretch.

Image

22. Serve the dish as is for vegans…

Image

… or offer shredded cheddar and possibly sour cream for vegetarians.

Image

Enjoy!

Capellini Pomodoro

A lot of my friends think that I’m weird.  This is a fair assumption.  I will admit that I’m strange; I have strange tastes and I’m picky.  Take, for example, my view on tomatoes.  I tell people I don’t like them, because it’s far easier than explaining the intricacies with my tomato infatuation.  I actually love tomatoes in most varieties: cooked, stewed, cured, soup, juice.  But I detest ketchup, and I won’t touch the goopy insides of a tomato unless I’m removing the seeds.  Bleh.

I do appreciate the tomato for all it offers.  It’s an excellent source of Vitamin C, and it is quite possibly one of the most versatile fruits with uses from breakfast to happy hour.  How can one not be somewhat enamored with it?

And with that, I offer my first recipe.  This is a fairly simple dish to try for your first gourmet meal.  Capellini Pomodoro, also known as tomato pasta, angel hair pasta with tomatoes, or even bruschetta pasta.  It pleases the pickiest of appetites – from my dad who was pretty frightened when we offered to cook him a  “Vegetarian Meal” for his birthday, to my (then 4 year old) niece who came up with this gem, “Just wrap it [the tomato] up and tell me it’s bacon.”  At a table with some of the pickiest eaters, everyone left stuffed and willing to eat leftovers.  Score!

All ingredients you need for this dish (aside from grated or shaved parmesan and cracked pepper to top) are in this picture.  It doesn’t get much more basic than this:

Image

Tomatoes can be kind of expensive, so I recommend making this dish if they are on sale.  Thanks to Michelle over at http://www.iheartpublix.com, I was able to get some good deals on plum tomatoes this week.  If you are in an area that uses Publix, I highly recommend reviewing the deals on this site before you go shopping each week.

Prep time: 30 minutes (give yourself extra time the first time you make it – 45 minutes)

Cook time: about 5-7 minutes (seriously)

Ingredients

  • 6-7 cloves of garlic (that’s the individual segments of the entire bulb that’s in the picture).  If you want to weigh them this is about 3/4 oz.
  • 3 Tablespoons (Tbsp) Extra Virgin Olive Oil (we prefer the Filippo Berio brand)
  • 2 lbs. tomatoes (recommend Roma/Plum tomatoes or tomatoes on the vine for best flavor)
  • 2/3 oz. fresh basil
  • 2 1/2 teaspoons (tsp) Salt (Table, Kosher or Sea Salt – you decide)
  • 1/2 Tbsp Balsamic Vinegar (if you’re picky about additives, the Alessi brand is pretty straightforward)
  • 1 lb. box Capellini (Angel Hair) Pasta
  • Optional Suggestions for Topping: Shredded or Shaved Parmesean Cheese and Cracked Pepper

Tools

  • Cutting Board
  • Knife
  • Sauté pan (skillet)
  • Stock pot (large pot for boiling water/cooking pasta)
  • Cooking spoon or spatula (no holes – we prefer wooden, but you pick what works for you)
  • Colander (to drain pasta)

What to do

  1. Fill stockpot with water for boiling the pasta.  Place on a burner and set at a medium heat.  Add salt to the water if desired.
  2. Clean tomatoes and basil.  You can use a solution of 3 parts water: 1 part vinegar to clean vegetables.  Just make sure you rinse it well to remove the vinegar taste.  Blot the basil to dry and dry the tomatoes.  Set aside.
  3. Remove the papery coating from your garlic.  Cut the tips off both ends and peel the paper off.  Your cloves should look like this:Image
  4. Mince the garlic, by making small slices along the length of the garlic clove and then cutting crosswise.  Continue to cut until small pieces like this:Image
  5. Place garlic in sauté pan and cover with olive oil.  Set aside.Image
  6. Cut tomatoes in half, and remove stem/core (Carl calls this the tomato belly button) by making a small triangular cut (two diagonal cuts) and pulling off.  The tomatoes will look like this:Image
  7. Remove the seeds from the tomato.  You can do this by running your thumb (pad) along fruit with the nail separating the seeds.  You may need to remove seeds from the middle of the fruit as well (you can cut a slit into the middle to remove the seeds, or just cut it with your thumb nail if it’s strong enough).  I usually keep a grocery bag nearby to put the seeds into for garbage (make sure there aren’t any holes in the bag first).  Your tomatoes should look like this:Image
  8. Dice the tomatoes by cutting them lengthwise in thin strips, and then cutting parallel to this.  Be careful!  Tomatoes can be squirrelly and slip.  Take your time, and be safe.  No hospital trips, please.  This is the part of the recipe that takes the most time.  Be patient and do not rush.  When this is done, set the tomatoes to the side.Image
  9. Remove basil from the stems.  You can do this by pinching off the leaf right at the stem.  See before and after:ImageImage
  10. Use a chiffonade cut on the basil.  This is a fancy term for small strips with a cross cut.  Don’t get overwhelmed with this.  The easiest way to do this is put all the leaves together in a stack and hold tightly.  Cut in small strips and work your fingers down the leaves as you cut more (keep that blade away your fingers!).  Do a crosscut (or two) by either turning the cutting board (easiest if you have the space) or the pile or basil (good for space saving).  Set aside.Image
  11. Turn the heat up on the water to get it boiling.  The water should be preheated since it’s been sitting on medium heat for this entire time.
  12. Place the sauté pan with the olive oil and garlic on a medium heat. When the oil starts to have tiny bubbles, add your pasta to the water (which should be boiling by now), and stir/toss the garlic with your cooking spoon.Image
  13. Sauté the garlic for about 1 1/2 minutes and add tomatoes.  Toss in the olive oil and garlic. Image
  14. Stir the pasta briefly.
  15. Add the balsamic vinegar to the tomatoes and toss the tomatoes and oil in the pan one more time.  Remove from heat.
  16. Check your pasta to see if it’s done.  Angel hair takes about 5 minutes tops – test it to see if it’s done to your preference.  When the pasta is done, drain in a colander and do not rinse.  Starch is good!
  17. Add the basil to the tomatoes and fold in.  You do this by taking a spoon of the tomatoes and slightly turning it over onto the basil.  Do this until thoroughly mixed.Image
  18. Stir salt into tomato/basil/garlic mix.
  19. Put the pasta back in the stockpot, and add the tomato/basil mixture.  Image
  20. Toss to coat, and serve immediately.  Top with shredded or shaved parmesan cheese and cracked pepper (if you like).  Image
  21. Add salt to taste.
  22. Have your friends and family members tell you you are an amazing cook and either take all the credit or share this blog/recipe with them.

Enjoy!

I hope if you give this recipe a try you enjoy it as much as we do.  It is a staple in our house, and we actually ate the leftovers cold tonight (it can be really refreshing in the summer).  You can add/reduce the amount of oil/salt based on your dietary needs or taste preferences.  Without cheese, this is a vegan dish with no cholesterol, with the cheese it is still low on cholesterol and good for vitamin C, antioxidants and omega 3 oils.  Eating healthy can actually be quite delicious.